


You don’t need a full remodel to make a tired bathroom feel current; you just need to target what’s dating it and spend where you’ll notice it daily. Start by spotting the biggest visual offenders—yellow lighting, worn hardware, busy walls, or mismatched finishes—then map quick wins against your budget. When you layer better lighting, tighten up décor, and choose modern, durable materials, the upgrade pays back fast. The next step is knowing what to change first…
Spot What Makes Your Bathroom Look Dated

Before you pick up a tile sample or call a contractor, walk through your bathroom and pinpoint the features that signal “outdated” at a glance—because fixing the right items first delivers the fastest ROI. Start with surfaces: cracked grout, glossy 4×4 squares, busy borders, and mismatched stone all read as outdated tiles.
Next, scan metals and shapes. Brass knobs, bulbous faucets, and smoked-glass shades often signal Vintage fixtures, especially when finishes don’t match.
Check lighting color and placement: yellow bulbs, a lone vanity bar, or shadows under eyes make the whole room feel old.
Inspect the vanity and mirror: swollen MDF, skirted bases, and builder-grade frames date the space.
Finally, note clutter magnets—exposed cords, crowded counters, and worn caulk lines.
Plan a Bathroom Refresh That Fits Your Budget
Set a realistic budget by pricing materials and labor first, then add a 10–15% contingency so you don’t blow your ROI.
Prioritize high-impact upgrades—fresh paint, updated lighting, a new vanity or fixtures—that change the look fast without major plumbing moves.
If the numbers still feel tight, phase the project over time so each step delivers visible value before you fund the next.
Set A Realistic Budget
Although a bathroom refresh can scale up fast, you’ll get the best ROI when you define a realistic budget upfront and align every choice to it. Start by setting an all-in cap, then split it into materials, labor, permits, and a 10–15% contingency for surprises behind walls.
Price your must-haves first, then decide where you’ll compromise so Budget constraints don’t derail the plan. Document your aesthetic priorities in one sentence (for example: “bright, modern, easy to clean”), and use it as a filter when comparing finishes and fixtures.
Get at least three itemized quotes, confirm what’s included, and lock timelines in writing. Track spend weekly, keep receipts, and stop scope creep before it starts.
Prioritize High-Impact Upgrades
When your budget has limits, you’ll get the biggest ROI by upgrading what buyers (and daily users) notice first: lighting, vanity, fixtures, and surfaces at eye level.
Swap a dated bar light for layered lighting: a bright overhead plus a high-CRI vanity sconce, and you’ll improve both function and perceived cleanliness.
Replace a tired vanity with a simple, well-proportioned cabinet and a new top; add a framed mirror for instant polish.
If you’ve got vintage fixtures, update to a matching modern set in a durable finish; you’ll unify the room without moving plumbing.
For outdated tiles, focus on what’s visible: re-grout, deep clean, or retile only the splash zone to sharpen the look while controlling labor costs.
Phase Projects Over Time
If your bathroom wish list outpaces your budget, phase the refresh so each step delivers a visible upgrade without triggering rework later. Start with planning: lock your layout, measure clearances, and choose a cohesive finish palette so future buys match.
Phase 1: refresh paint, caulk, and hardware; add a quieter fan and a bright LED mirror for instant ROI.
Phase 2: upgrade lighting circuits, outlets, and shutoffs while walls are accessible, even if you delay surfaces.
Phase 3: install the vanity, storage, and durable flooring.
Phase 4: splurge on luxury fixtures like a thermostatic valve and quality faucet, after plumbing’s set.
Save vintage tiles for the final accent wall or niche so you don’t risk mismatched dye lots.
Upgrade Bathroom Lighting for Better Daily Tasks
Upgrade your bathroom lighting with layered sources—ambient overhead, targeted vanity, and a subtle night option—so you get bright, shadow-free light where you use it most.
Add task-lighting mirrors or vertical sconces at eye level to sharpen grooming visibility and reduce makeup or shaving mistakes. You’ll boost daily performance and perceived finish quality with a relatively low-cost change that pays back every morning and night.
Choose Layered Light Sources
Because bathroom tasks demand both precision and comfort, you’ll get the best ROI by choosing layered light sources instead of relying on a single overhead fixture. Start with layered lighting that pairs ceiling-mounted general light with supplemental sources to reduce shadows and eye strain.
Use dimmable LEDs so you can shift from bright morning routines to softer evening wind-downs while cutting energy costs. Aim for 2700–3000K for a flattering, calm feel, or 3000–3500K if you want a crisper look for cleaning.
Add a wet-rated recessed can over the shower, and place an extra ceiling fixture near the vanity zone for even coverage. Prioritize high CRI (90+) for accurate color, especially with makeup and towels.
Maintain code.
Add Task Lighting Mirrors
When you rely on a single overhead light at the vanity, shadows land right where you need clarity. Swap in a task-lighting mirror to put light at eye level, so shaving, makeup, and skincare take less time and deliver better results.
Choose an LED mirror with high CRI (90+) and 3000–3500K color temperature for accurate tones and a flattering finish.
Dial in mirror placement before you buy: center it on the sink and your face, not the backsplash. Mount it so the middle sits near eye height, and pair it with slim side sconces if the vanity is wide.
Hardwire when possible for a cleaner look, or use plug-in with a hidden outlet. You’ll cut glare, boost daily usability, and modernize fast.
Swap In Modern Bathroom Mirrors and Accessories

How quickly can a bathroom feel new without touching tile or plumbing? Swap your mirror first. Choose a thin metal frame, soft-arched silhouette, or backlit edge to modernize the sightline you use daily.
If you’ve got Vintage frames or ornate fixtures, either lean in with a single statement mirror or replace them with a clean, consistent finish to reduce visual noise and boost resale appeal.
Then upgrade accessories that read as “clutter”: a matching soap dispenser, low-profile tissue cover, and a tray that corrals daily items. Add two coordinated hooks and a slim shelf to get counters clear.
Keep materials durable—powder-coated metal, sealed wood, or stone composite—so the refresh lasts and looks intentional.
Update Bathroom Hardware for a Quick Lift
Even if you don’t change a single surface, new hardware can make the whole bathroom read “updated” in an afternoon. Start with Hardware upgrades you touch daily: faucet handles, shower trim, towel bars, toilet lever, and cabinet pulls. Match finishes across pieces so the room looks intentional, not patched.
Measure first: hole spacing on pulls, escutcheon size on faucets, and valve compatibility on shower controls. Choose solid brass or stainless for fewer callbacks and longer shine.
When you do Fixture replacement, keep the plumbing footprint the same to avoid tile or drywall repairs. Replace yellowed switch plates and outlets, too—they’re cheap and visible. Save receipts and packaging so returns are painless.
For ROI, prioritize the faucet and shower trim; buyers notice wear there immediately and visually.
Choose Modern Bathroom Finishes That Won’t Date Fast
Because bathrooms age fast in buyers’ eyes, you’ll get the best ROI by choosing modern finishes that read clean and timeless instead of trend-driven.
Start with timeless tiles: matte white or soft greige porcelain in larger formats reduces grout lines, looks newer longer, and appeals to more shoppers. Use a simple, consistent layout (stacked or straight-set) rather than busy patterns that can lock you into a decade.
Specify durable fixtures in widely loved finishes like brushed nickel, chrome, or matte black, and keep them consistent across faucet, shower trim, and accessories.
Pick solid-surface or quartz tops over fussy edges, and choose undermount sinks for easy cleaning.
For the shower, add clear glass and a linear drain only if you can keep slopes correct.
Refresh Bathroom Walls With Paint or Wallpaper
When you refresh your bathroom walls with paint or wallpaper, you can change the room’s perceived age faster (and cheaper) than most fixture upgrades. Choose moisture-rated satin or semi-gloss paint to resist steam and wipe clean, and patch dings before you roll so the finish reads new.
Keep color schemes tight: pair a light neutral with one deeper accent to make tile and hardware look intentional, not dated. If you want bigger impact, use vinyl or nonwoven wallpaper labeled for bathrooms, and seal seams near the shower with clear edge adhesive.
Consider wall textures: smooth drywall looks modern, while subtle grasscloth-look prints add depth without busy patterns. Measure carefully, buy extra dye-lot, and prime for adhesion.
Add Small Bathroom Styling Touches That Feel Intentional
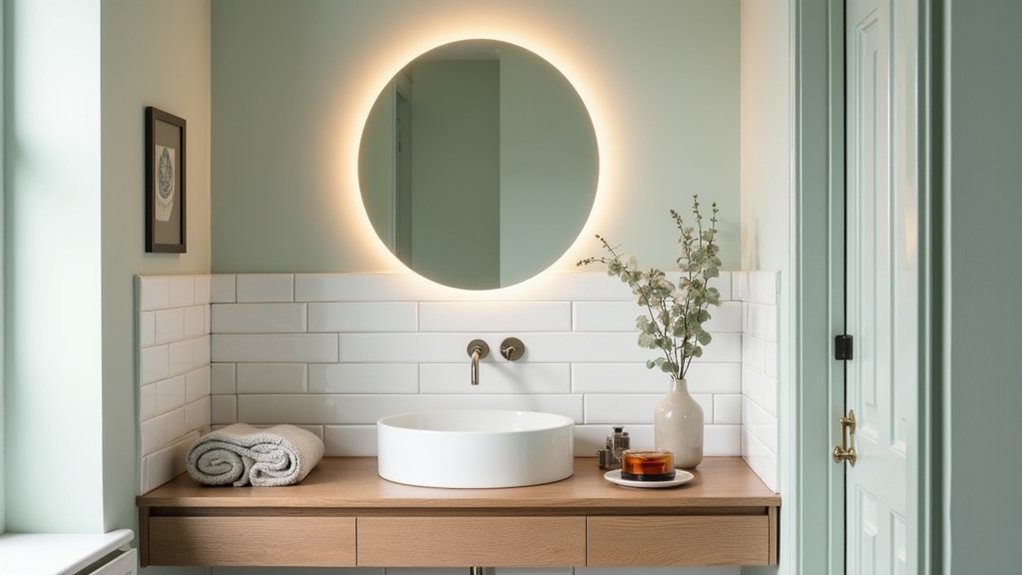
After you’ve updated the walls, lock in a “finished” look with a few small styling moves that deliver outsized ROI in a tight footprint. Start by editing your counter: keep only daily-use items on a tray, and hide backups in a lidded box.
Add Decorative accessories that earn their space—one sculptural soap pump, matching canisters, and a slim vase that won’t crowd the sink. Swap in hotel-level textiles: two plush white towels plus one accent hand towel for color, all on a sturdy hook bar.
Use a small framed print or mini mirror to fill blank wall space without drilling heavy anchors. Finish with Personal touches: a signature scent, a plant that tolerates humidity, and a cohesive color story.
Frequently Asked Questions
What Permits Are Needed for a Bathroom Renovation in My Area?
Chances are, you’ll need building, plumbing, and electrical permits—coincidentally, the same set most homeowners miss first. Check Permit requirements and local building codes for structural, wet-area, venting, and fixture changes to protect ROI.
How Long Does a Typical Bathroom Refresh Take From Start to Finish?
You’ll typically finish a bathroom refresh in 3–10 days, depending on scope and scheduling. You’ll save time by keeping plumbing, reusing vintage fixtures, and locking color schemes early to avoid rework.
Should I Hire a Contractor or DIY Most Bathroom Updates?
Hire a contractor for plumbing, electrical, and waterproofing; DIY paint, hardware, and décor. Like steering a ship, you’ll avoid leaks with DIY safety, control contractor costs, and protect ROI by meeting code and timelines.
How Can I Improve Bathroom Ventilation to Prevent Mold and Odors?
Install a properly sized, ducted exhaust fan and run it 20 minutes after showers. Seal and insulate ducts, add a timer or humidity sensor. These ventilation options boost mold prevention, cut odors, and protect resale value.
What Upgrades Add the Most Resale Value in a Bathroom?
You’ll hit it out of the park by upgrading the vanity, toilet, and shower with luxury fixtures, improving lighting, revitalizing tile using eco friendly materials, adding strong ventilation, and boosting storage—buyers notice durability, efficiency, and clean finishes.