

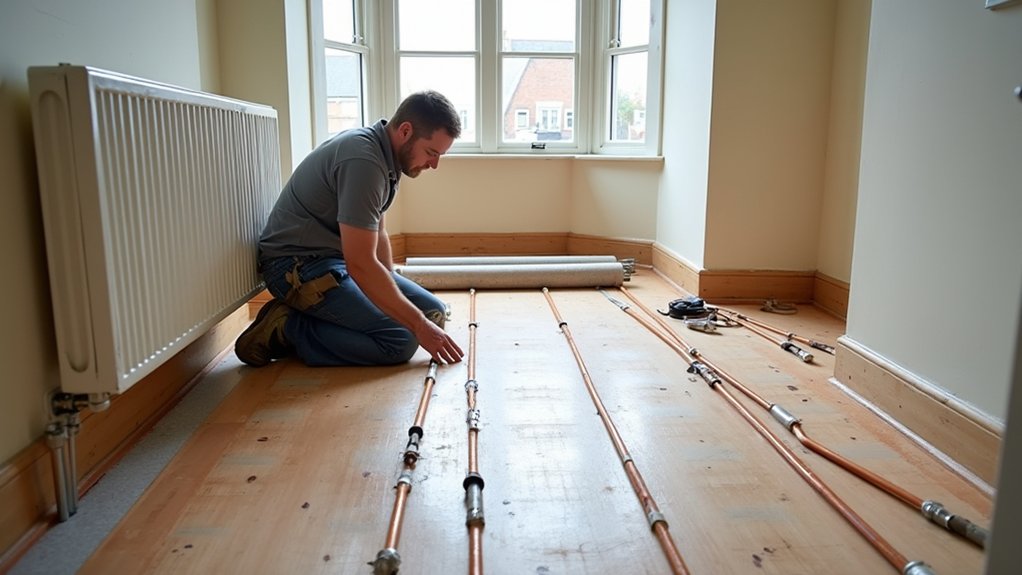
With heating accounting for around 60% of a typical British home’s energy use, installing underfloor heating can improve comfort while supporting more even heat distribution. You’ll need to choose between an electric underfloor heating system and a wet system, then assess your subfloor, insulation, floor height, and available controls. Careful planning prevents costly mistakes, but the installation details become critical once you start routing cables or pipes beneath your finished floor.
Choose Electric or Wet Underfloor Heating
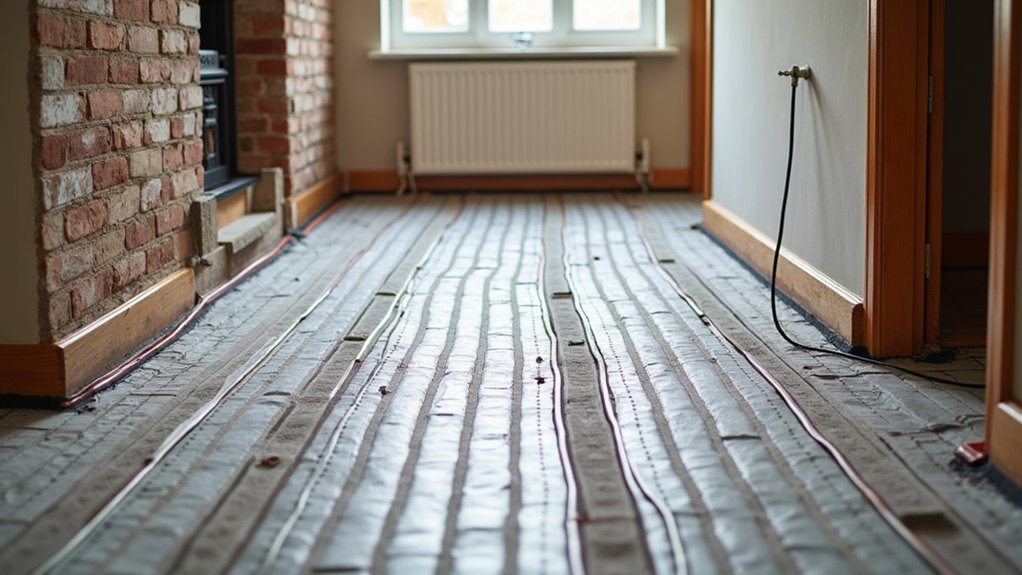
Start by choosing between electric and wet underfloor heating, as each system suits different homes and installation conditions. Electric systems use heating cables or mats beneath the finished floor. You’ll usually find them simpler and cheaper to install in a single room, particularly during a renovation, and they respond quickly to thermostat adjustments.
However, running costs can be higher across large areas. Wet systems circulate warm water through connected pipes, typically supplied by a boiler or heat pump. They suit whole-house projects and can deliver stronger long-term energy efficiency, especially with a low-temperature heat pump.
But installation involves more plumbing and controls. Compare your available power supply, heating demand, floor finishes, and budget. Also consider maintenance requirements: electric systems have few service needs, whereas wet systems need periodic checks of pumps, valves, and connections.
Check the Subfloor, Insulation and Floor Height
Before you choose an installation method, inspect the subfloor for damp, movement, cracks, uneven areas, and damage, then repair any problems so the heating system has a stable base. Test subfloor moisture with a suitable meter, particularly over concrete, and follow the flooring manufacturer’s limits.
Remove dust, grease, and loose material, then correct significant level differences with an appropriate smoothing compound. Check whether the existing structure can support the system and final floor covering without flexing.
Choose insulation types that suit your construction, such as rigid boards beneath electric mats or floor panels, and verify their thermal resistance and compression strength. Insulation reduces downward heat loss and improves efficiency.
Finally, measure available floor height at doors, stairs, skirting boards, and thresholds. Allow for insulation, heating components, adhesive, screed, and flooring before installation.
Plan Heating Zones and Prepare the Floor
Map each heating zone according to room use, floor area, heat-loss requirements, and the location of your manifold. You’ll need separate controls for areas with different temperatures, such as bathrooms and living rooms.
Before installation, clean, level, and dry the subfloor. Repair defects, and confirm that it’s suitable for the chosen heating system and floor finish.
Map Heating Zones
Once the floor is clean and structurally sound, mark each heating zone on your plan, showing the room boundaries, manifold location, pipe routes, and areas that won’t need heat, such as beneath fixed kitchen units, baths, and fitted wardrobes.
Keep pipe lengths within the manufacturer’s limit, and divide large or irregular rooms into separately controlled zones where practical. Allow for expansion gaps, door thresholds, sanitaryware, and permanent fixtures when drawing routes.
Note the flow and return paths so each circuit reaches the manifold without unnecessary crossings or tight bends. Label every zone clearly, including its thermostat and proposed floor sensor position.
This zone zoning plan will simplify installation and later control calibration. Check the layout against heat-loss calculations, window positions, and insulation requirements before you approve the design.
Prepare the Subfloor
How level is the floor, and can it support the heating system without movement or moisture problems? Check the subfloor with a straightedge, then remove dust, adhesive, and loose material. Repair cracks, fill hollows, and grind high spots; underfloor heating needs an even surface to prevent damage and uneven heat.
Test subfloor moisture, particularly on concrete or newly laid screed, using a calibrated meter or approved hygrometer. Don’t install until readings meet the heating manufacturer’s limits. If moisture remains high, identify the source and apply a compatible damp-proof membrane or allow further drying.
Confirm subfloor stability by checking for squeaks, flexing boards, or movement between sheets. Secure timber boards and replace damaged sections. Prime or seal the prepared surface where specified, then allow it to cure fully. Keep the area clean before laying insulation, cables, pipes, or mats.
Install Electric Mats or Water Pipes
Choose electric mats for simpler, room-by-room installation, or lay water pipes when connecting to a suitable wet-heating system.
Position mats or pipes evenly over the prepared floor, keep them clear of fixed furniture, and follow the manufacturer’s spacing and resistance requirements.
You’ll then connect the heating controls, thermostat, and power or manifold supply through a qualified electrician or heating engineer.
Choose Electric Mats
Electric mats are often the most practical option for a single room, renovation, or project where raising the floor level must be kept to a minimum. You’ll install the thin, flexible mat directly beneath the finished floor, making it suitable for bathrooms, kitchens, and other targeted spaces.
Before buying, measure the usable floor area and exclude fixed units, sanitaryware, and built-in cupboards. Choose a mat with the correct wattage for your room’s heat-loss requirements, then confirm that your floor covering is compatible with electric underfloor heating.
Plan the thermostat position and sensor route carefully, because you shouldn’t cut or overlap the heating cable. For electrical safety, use a qualified electrician to connect the system and provide appropriate protection through an RCD.
Good insulation beneath the mat also improves heating efficiency and reduces running costs.
Lay Water Pipes
If you’re using a wet underfloor heating system, lay the water pipes over the insulated floor and secure them according to the manufacturer’s spacing plan. Start at the manifold, follow the planned circuit, and keep bends smooth to prevent kinks.
Maintain the specified spacing, particularly near external walls and colder areas, but don’t exceed the pipe’s minimum bend radius. Use suitable clips or fixing rails at regular intervals so the pipe can’t float when you add the screed.
Fit pipe insulation where the design requires it, especially around perimeter zones and expansion joints.
Before covering the installation, check every connection and perform a pressure test with clean water. Monitor water pressure for the period specified by the manufacturer, looking for leaks or drops.
Photograph the layout for future reference.
Connect Heating Controls
With the pipework or electric mats installed and tested, connect the heating controls according to the wiring diagram supplied with your system.
Isolate the electrical supply at the consumer unit before opening any terminals.
Route sensor, actuator, and power cables neatly, keeping low-voltage sensor wiring separate from mains cables.
Connect the floor probe to the thermostat, then link thermostats to the wiring centre or electric-mat controller.
For a wet system, wire the pump, boiler demand, and zone valves as specified; don’t bypass safety controls.
Check polarity, earth continuity, and cable ratings, and have a qualified electrician complete or certify mains connections.
Program floor and air-temperature limits, schedules, and frost protection.
A programmable thermostat, app-based remote control, and weather compensation can improve energy efficiency.
Test every zone before covering the floor.
Wire Thermostats and Test Each Heating Zone
Once the underfloor heating cables or pipes are in place, wire each thermostat to its corresponding control-channel terminals according to the manufacturer’s wiring diagram, keeping mains power isolated throughout the work.
Check every conductor, earth connection, and sensor lead, then tighten terminals securely without damaging cables.
Confirm Thermostat placement reflects the heated area, avoiding direct sunlight, draughts, radiators, and concealed pipework.
Label each thermostat and cable clearly so you can trace every circuit.
Restore power only after inspecting the wiring and fitting the control-panel cover.
Select one zone at a time and verify that its thermostat calls for heat, the correct channel indicator responds, and the associated actuator or relay operates.
Use Zone isolation to test circuits independently, checking resistance and sensor readings against the manufacturer’s stated values.
Record results and rectify faults before proceeding.
Install the Floor Covering and Run the System Safely
After every zone passes its electrical and sensor checks, install the floor covering in line with the heating system and adhesive manufacturer’s instructions.
Confirm that tiles, engineered timber, vinyl, or carpet suit underfloor heating, and check the manufacturer’s maximum thermal resistance.
Apply compatible adhesive or levelling compound evenly, avoiding damage to cables or mats.
Don’t switch on the system while materials cure; follow the stated drying time, usually several days.
Once cured, increase the thermostat gradually, raising the floor temperature by no more than 1°C daily.
Keep the system below its specified limit and monitor each zone for even warmth.
Your safety precautions should include isolating power before alterations, keeping records of test results, and having a qualified electrician inspect any fault.
Never cover heating controls or obstruct room sensors.
Frequently Asked Questions
Can Underfloor Heating Be Installed Beneath Heavy Furniture or Kitchen Units?
Yes, you can install underfloor heating beneath heavy furniture, but avoid fixed kitchen units, wardrobes, and appliances, which trap heat. Check Floor compatibility, plan Furniture placement carefully, and follow manufacturer temperature and spacing requirements.
How Long Does Underfloor Heating Typically Last in a British Home?
You’ll typically get 25–50 years from electric or wet underfloor heating in a British home. Proper installation, maintenance, and controls protect energy efficiency, while higher installation costs may deliver dependable, long-term performance.
Will Underfloor Heating Affect My Home Insurance or Property Valuation?
You’ll usually find underfloor heating causes no insurance complications, but notify your provider and use certified installers. Insurance compatibility depends on policy terms; Property value impact is generally positive when installation is documented and efficient.
Can Pets Safely Lie Directly on Floors Heated by Underfloor Systems?
Yes, your pets can safely lie on heated floors if you maintain a moderate Floor temperature. Monitor Pet safety, provide cooler areas, and prevent prolonged exposure, especially for elderly, ill, or heat-sensitive animals.
What Maintenance Does Underfloor Heating Require After Installation?
You’ll need minimal maintenance: inspect controls annually, bleed hydronic systems, check pressure, flush circuits periodically, and keep sensors clear. Clean floor surfaces normally. Schedule professional servicing to preserve thermal efficiency, reliability, and energy savings.